
I know, I know–I am way late in posting this. I think it’s because my aunt asked me for the recipe and I ended up sending her some long instructions via email that tricked my mind into thinking I’d written about it here. Nopers.
But the good news is that since I’ve already typed it out once before there is a good chance I will remember at least 80% of how I made it. 😛
The spring season in Texas feels like an insanely short Maine summer. The winters can be bone-chilling, the summers insufferably hot. But the 2-3 weeks between these two extremes is sweet perfection. I mean, the smell of orange blossoms alone is enough to make you swoon. I’m pretty sure they are what inspired me to bring this citrus cake to fruition (lol puns).
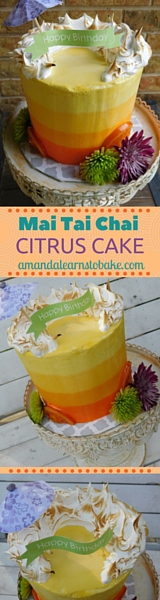
I chose the Mai Tai because I wanted the cake to taste (and look) like a fruity, summery cocktail. My original plan was to make a grenadine simple syrup for the cake layers, but my bartender friend told me it would be far too strong. He recommended a chai tea simple syrup instead, which is what they use at his restaurant.
Hence, the Mai Tai Chai was born.
New goal: Alternating layers of orange and pineapple cakes soaked in a chai tea simple syrup and iced with a delicious rum buttercream.
The orange cake recipe was easy. I used this recipe from Fine Cooking. The cake is flavored via the zest and juice of fresh oranges. No extract here!
The pineapple cake was not as easy. Most of the recipes online are for Pineapple Upside Down Cakes. Another issue I had was that I wanted both cake flavors to be similar in texture, since it would be weird to layer a heavy pound cake with a fluffy sponge cake, etc. What I ended up doing is adapting the orange recipe above into a pineapple cake recipe. And yes, my first attempt was a horrible failure. Did you know that pineapples are like wayyyy up there on the acid scale, laughing in the faces of bakers trying to put them in a cake?
Well, I conquered dem bitches. At least I think I did. I personally liked the pineapple cake more than the orange one, as evidenced by my eating an entire layer that could have gone on the cake.
One more thing: I don’t recommend coloring the cake batter of either cake. My original plan was to color the orange cakes orange (duh) and the pineapple cakes yellow. I baked the cakes without coloring first and they were absolutely perfect. When I baked them again with coloring added the texture seemed a little off. Plus all of that beautiful orange zest won’t show through.
So without further ado:
Orange Layer Cake
- Recipe here
Pineapple Layer Cake (adapted from orange cake above):
- Replace the orange juice with pineapple juice (from a large can of crushed pineapples in water). If you can’t quite get a cup of juice, just add water.
- Add 1/2 cup of crushed pineapple that has thoroughly drained on some paper towels. You want to get as much of the moisture out as possible. Use the paper towels to press on the pineapples so that they soak up most of the juice.
- Add 1/2 tsp of baking soda to make up for the extra acidity in the recipe
Chai Simple Syrup:
- Bring 1 cup (8 fl oz) of water and 1 cup (200 g) of granulated sugar to a simmer. Once the sugar has melted add 1-2 Chai tea bags. Let the mixture simmer for about 5 minutes and then remove it from the heat and allow it to cool to room temperature.
Rum Buttercream:
- 1 cup (227 g) of softened unsalted butter
- 4 cups (500 g) of powdered sugar (may need more or less)
- 1/4 cup (2 oz) rum of your choice (I used coconut rum)
- 1 pinch of salt
- 1 tbsp of vanilla extract
Meringue:
- Beat two egg whites until frothy then add a pinch of cream of tartar
- Once the whites are no longer opaque and seem to be gaining in strength and volume slowly add 2-3 tablespoons of powdered sugar. Continue to beat on med-high until the mixture resembles marshmallow and can hold a stiff peak.
Oh geeze. Maybe my lack of pics is the real reason I never posted this recipe. I will do my best to fill in the blanks!
Decorate it!
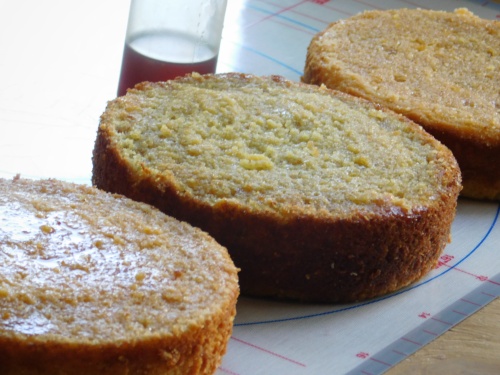
Step 1: After leveling all of your cake layers, soak each one with the chai simple syrup. I used a little squirt bottle I bought at Michaels but you could easily just brush or spoon it on.
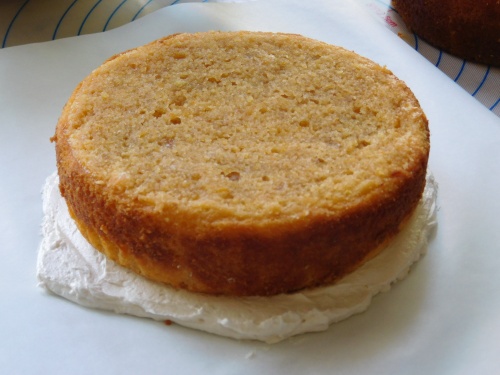
Step 2: As you can see, I opted for the upside down method. The icing is still white here because this is the crumb coat. Cover a flat surface with some parchment or wax paper (it is a good idea to secure it with tape) then glob on some frosting. Spread it out so it is wider than your cake and then place your first layer on top. When all is said and done this will actually be the top of your cake.
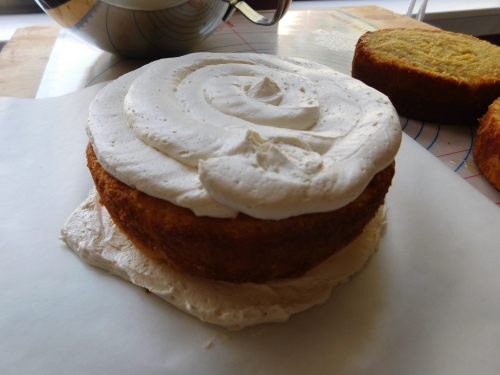
Just building them up…..
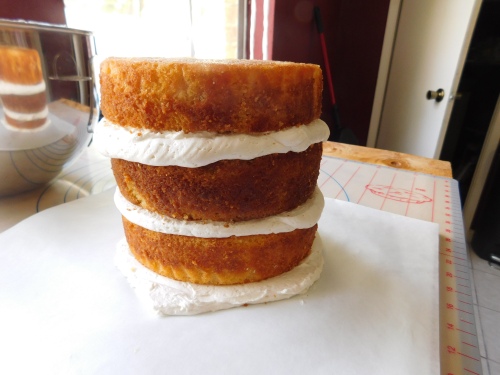
There we go. Please ignore the creepy door.
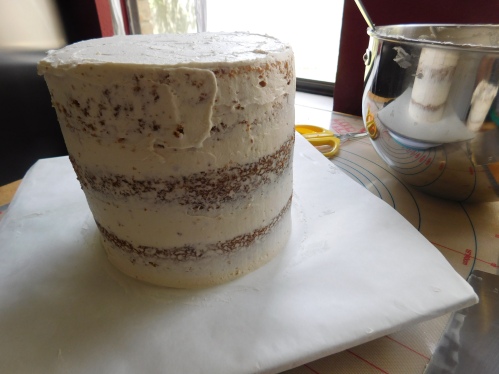
Step 3: Give her a good ole crumb coat and place her in the fridge to set! This picture also shows how my parchment was attached to a flat surface. What it doesn’t show is that I actually stuck a cake round on the top (since the top is really the bottom…are you follow along ok?). Once the icing sets you cut the parchment paper around the cake, detaching it. Then you flip the whole thing over and peel off the remaining parchment. You’ll be left with a flat top so nice that Kid n’ Play would rap with it.
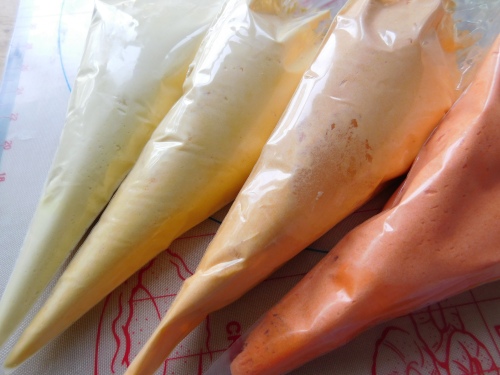
Step 4: Divide your remaining icing into four bowls and color them different shades of orange and yellow. Did I mention that this is literally the last picture I took of my decorate process for this cake? I’m a fantastic blogger. 😦 To be fair, this cake was made months ago and I think I’ve gotten a little better.


Step 5: To make it up to you, here is sneak peak of the cake I decorated yesterday that uses this same striping technique. As you can see, it is as easy as piping the stripes in the order that you want them and then using your bench scraper or spatula to scrape around the cake. The excess icing comes off but the stripes stay on!
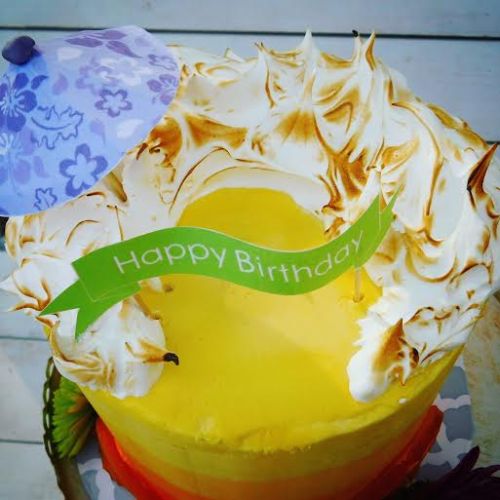
Step 6: Unfortunately, I also did not take any pictures of myself applying the meringue. But here is a nice picture of the top of the cake so that you can see I added it in a sort of U shape. You can really glob it on however you want. I wish I would have made it cascading down the sides. Or perhaps covered the whole top. You need a butane torch to get these crispy tops, but be careful not to melt your buttercream!
Those were the main components of the cake, but as you can see I also added some fresh flowers, some (failed) candied orange slices (seriously they were so sticky and not at all candied), and a cocktail umbrella for the top. I printed out a little happy birthday sign and hot glued it to some toothpicks. All in all, not too difficult of a decorating technique!
So once again, I apologize for the super late posting of this cake! I hope that if you try it you will let me know how it turned out!
Until next time!